Adding video layers to your XNA code

Written by Dean Edis on .

In our first article we covered how we can write a simplified Photoshop-style API for displaying multiple textures on the screen, and we have since extended the code to support parallax scrolling.

In this article we will add a short class which allows us to display Video objects as layers. In the future when we will develop our ‘layer’ code further we will be able to add post-processing filters (such as radial blur, grayscale, brightness/contrast), which could result in some great looking effects.

Here’s a screenshot showing video playing on one layer, with another layer showing information about the video:
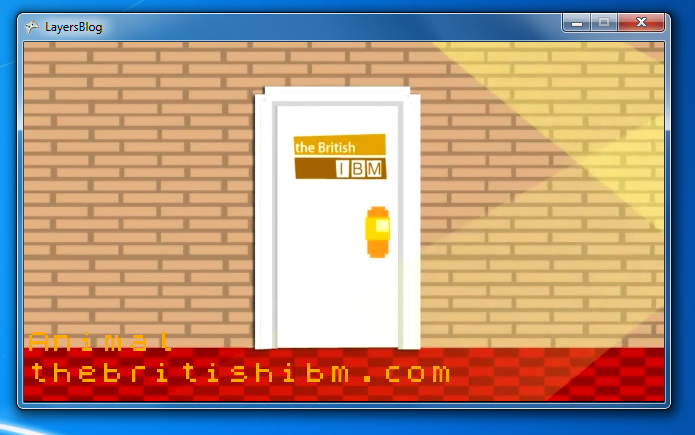
(If you like the track then I recommend going to thebritishibm.com to view it in full, and more. It makes excellent music to code to!)

The code for this is quite straight-forward. When constructing a new VideoLayer object was pass in the Video we would like to play, and specify whether we want it to start playing immediately. We can optionally set whether we want the video to loop using the AutoRepeat property.

Here’s the new class:

public class VideoLayer : Layer, IDisposable
{
    private readonly Video m_video;
    private readonly bool m_autoPlay;
    private VideoPlayer m_player;
    private bool m_isFirstUpdate = true;

    /// <summary>
    /// Gets or sets a value indicating whether to automatically loop the video.
    /// </summary>
    public bool AutoRepeat
    {
        get { return m_player.IsLooped; }
        set { m_player.IsLooped = value; }
    }

    /// <summary>
    /// The constructor.
    /// </summary>
    /// <param name="video">The Video object to play.</param>
    /// <param name="autoPlay">Whether to start as video playing as soon as Update(...) is called.</param>
    public VideoLayer(Video video, bool autoPlay)
    {
        m_video = video;
        m_autoPlay = autoPlay;
        m_player = new VideoPlayer();
        AutoRepeat = true;
    }

    public void Play()
    {
        m_player.Stop();
        m_player.Play(m_video);
    }

    public void Stop()
    {
        m_player.Stop();
    }

    public override void Update(GameTime gameTime)
    {
        if (m_isFirstUpdate)
        {
            if (m_autoPlay)
                Play();
            m_isFirstUpdate = false;
        }

        base.Update(gameTime);
    }

    public override void Draw(SpriteBatch spriteBatch)
    {
        spriteBatch.GraphicsDevice.Clear(Color.Black);

        if (m_player.State != MediaState.Stopped)
            spriteBatch.Draw(m_player.GetTexture(), Origin, CreateWhite(ActualOpacity));
    }

    public void Dispose()
    {
        if (m_player == null)
            return;
        m_player.Dispose();
        m_player = null;
    }
}

As always, you can download the full source (including a pre-built sample application showing its usage) from the link below.

DOWNLOAD SOURCE

Adding Parallax scrolling to your XNA code

Written by Dean Edis on .

In our previous article we covered how we can write a simplified Photoshop-style API for displaying multiple textures on the screen.

In this article we will develop the code further to allow parallax scrolling. Parallax scrolling is used widely in games, and is useful for causing objects in a 2D scene to appear ‘distant’ by making them scroll at a slower rate than those ‘in front’.

To do this we build on our existing Layers class, as in principle we want to create a single ‘layer-able’ object containing multiple overlaid textures, creating ParallaxLayer.

For example:

First we need to allow the position of a Layer to be set. That’s easy enough - We just add a Vector2 Layer.Origin property and use this value in the TextureLayer.Draw(...) code:

public override void Draw(SpriteBatch spriteBatch)

{

 spriteBatch.Draw(m_texture, Origin, CreateWhite(ActualOpacity));

}

Then, when calling ParallaxLayer.Update(...) we scale the Origin of each Layer according to a preset amount:

public override void Update(GameTime gameTime)

{

 foreach (var layerInfo in m_layerInfos)

 layerInfo.Layer.Origin = Origin * layerInfo.MovementFactor;


 base.Update(gameTime);

}


When adding each layer to the ParallaxLayer object we also set the movementFactor value (typically in the range of 0.0f to 1.0f).

In the example code we use these values:

// Create a Layers object, and define the order of the layers to display.

m_rootLayers = new ParallaxLayer();

m_rootLayers.Add(cloudsLayer, 0.2f);

m_rootLayers.Add(mountainsFarLayer, 0.6f);

m_rootLayers.Add(mountainsNearLayer, 1.0f);

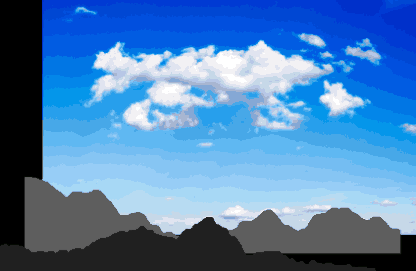
...to create a scene looking like this:

The scene can be scrolled using the arrow keys to show how each Layer moves relative to the others.

I hope you find the code useful!

DOWNLOAD SOURCE

Adding Photoshop-style layers to your XNA code

Written by Dean Edis on .

We recently added a ‘credits’ stage to our Lunar Panda Deluxe XNA game, and wanted a simple way of fading from one screen-sized bitmap to another. We would chain these bitmaps together so we could show several ‘stills’ from the game as a simple slideshow.

This prompted me to write our Layers class.

Simply put, this mimics the sort of basic image layering you would see in a paint package such as GIMP or Photoshop. The code supports nested layers with varying opacity, and is easily extended to support many more features.

Being able to nest layers is a very powerful feature. You could assign a game HUD as one (or more) layer, and have several layers to represent your actual game screen. In Lunar Panda this could be the ‘space’ background image, animated moons, Mr Panda, active obstacles, and the moon terrain itself.

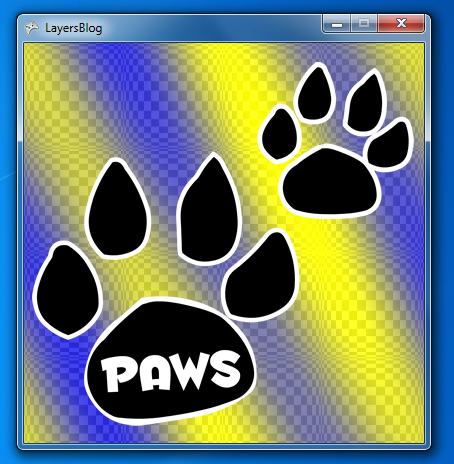
Here is a screenshot showing three separate layers superimposed on each other. One of them has a custom opacity applied:


The bottom-most layer is a blue/yellow plasma effect. Then comes a slightly transparent chequered pattern, then the ‘PAWS’ texture on top.

You can download the fully documented Layers code (including the example source and pre-built binary) from here:

DOWNLOAD SOURCE

In the example code we create the Layers object in the LoadContent() routine. First we load the Texture2D objects:

var patternLayer = new TextureLayer(Content.Load("pattern"));
var plasmaLayer = new TextureLayer(Content.Load("plasma"));
var pawsLayer = new TextureLayer(Content.Load("paws"));


Then tweak the opacity values:

// Tweak layer opacity.
plasmaLayer.Opacity = 0.9f;

 ...and finally add them to our Layers object:

// Create a Layers object, and define the order of the layers to display.

m_rootLayers = new Layers(); 
m_rootLayers.Add(patternLayer); 
m_rootLayers.Add(plasmaLayer); 
m_rootLayers.Add(pawsLayer);

Drawing the layers is now simple:

protected override void Draw(GameTime gameTime)
{ 
GraphicsDevice.Clear(Color.CornflowerBlue); 
m_spriteBatch.Begin(); 
m_rootLayers.Draw(m_spriteBatch); 
m_spriteBatch.End(); base.Draw(gameTime); 
}

In a future post I’ll show how to extend this code to animate the opacity values over time, allow layers to be used as image masks, and support parallax scrolling.

Charlie Brooker: Videogames Changed the World

Written by Adrian Killens on .

Back in 2010 I took on a little project that I called 'Song A Week' for which I wrote and recorded one song every week for an entire year. A by-product of which was a selection of YouTube clips that I made to go with some of those songs. One such video featured Steve Bradshaw, a friend of mine, writing a video game on the ZX Spectrum called Chasing Aidy. I'd actually forgotten all about this until Channel 4 contacted me a little while ago asking if they could use part of it in an upcoming video game documentary. Obviously I said yes. The documentary turned out to be Charlie Brooker: Videogames Changed the World. So there go, a few seconds of fame and I even got my name in the end credits!

If you haven't already seen it then go check it out on 4OD and if you want to see the entire clip then here it is in all its low-fi glory!