The Lunar Bundle
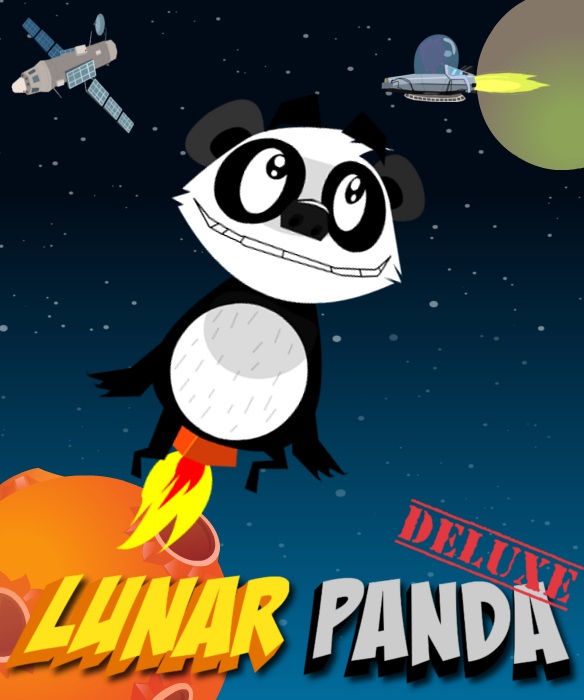
We've done a little deal with our good friends at Kiss My Bundles and for a limited time you can grab yourself a copy of Lunar Panda Deluxe for the PC along with a whole load of other games for a very reasonable $3.99.
We've done a little deal with our good friends at Kiss My Bundles and for a limited time you can grab yourself a copy of Lunar Panda Deluxe for the PC along with a whole load of other games for a very reasonable $3.99.
Some fantastic news for all you Panda fans out there! Lunar Panda Deluxe has literally just been approved by the lovely people at Desura and is now available to purchase for the PC. So what are you waiting for? Grab yourself a copy today and help support us so we can make more excellent games that may or may not include a Panda ;-)

The fact that XNA comes with minimal built-in ability to display attractive-looking UIs can be seen as both an advantage and a disadvantage.
When you're writing an application that needs to put up a dialog though (and you don't want to break XNA's cross-platform support by using WIN32 calls!), it can be annoying!
We're in the process of writing the infrastructure for our next game, and in it we'd like to be able to display a range of attractive UI styles, without too much overhead.
So to help with this I've written code to display a dialog background using only a template image. The class ensures that the dialog can be displayed at any sensible size, without introducing unpleasant 'stretch' artifacts.
To start off with, let's see an example of a dialog template, and how it could be made to appear on the screen:

To display this on our XNA screen at any given size, we first need to split the bitmap into a 3x3 grid of 'virtual' regions. (I've also reduced the size of the template, as it doesn't need to be too big.)

The corner areas will be blitted to the screen without any scaling applied to them. The top and left edges will be stretched in one direction only, and the centre-most region will be scaled in both direction as appropriate.
The result is nice-looking dialog background, regardless of the dimensions of the original template image - You only need to define the size of the 'margin' on your original template image such that it incloses each of the corners.
The code is quite straight-forward, and easy to import into your own projects. Just create an instance of BorderBitmap, passing in your dialog texture and the pixel size of a ‘corner’, then call Draw() from your display code.
Finding dialog templates online isn't too tricky. I certainly recommend here:
http://opengameart.org/
I hope you find this useful!
/// <summary>
/// For drawing a textured bitmap where the corner sections remain unscaled but the remaining area is stretched to the desired screen size.
/// </summary>
public class BorderBitmap
{
    private readonly Texture2D m_texture;
    private readonly int m_cornerPixels;

    public BorderBitmap(Texture2D texture, int cornerPixels)
    {
        if (texture == null)
            throw new ArgumentNullException("texture");

        m_texture = texture;
        m_cornerPixels = cornerPixels;
    }

    public void Draw(SpriteBatch spriteBatch, int x, int y, int width, int height)
    {
        var sourceArea = new Rectangle(0, 0, m_texture.Width, m_texture.Height);
        var sourceInnerArea = new Rectangle(m_cornerPixels, m_cornerPixels, sourceArea.Width - 2 * m_cornerPixels, sourceArea.Height - 2 * m_cornerPixels);

        spriteBatch.Draw(m_texture, new Rectangle(x + m_cornerPixels, y + m_cornerPixels, width - 2 * m_cornerPixels, height - 2 * m_cornerPixels), sourceInnerArea, Color.White);

        if (m_cornerPixels > 0)
        {
            DrawSides(spriteBatch, x, y, width, height, sourceInnerArea);
            DrawCorners(spriteBatch, x, y, width, height, sourceInnerArea);
        }
    }

    private void DrawCorners(SpriteBatch spriteBatch, int x, int y, int width, int height, Rectangle sourceInnerArea)
    {
        // Top-left
        spriteBatch.Draw(m_texture, new Vector2(x, y), new Rectangle(0, 0, m_cornerPixels, m_cornerPixels), Color.White);

        // Top-right
        spriteBatch.Draw(m_texture, new Vector2(x + width - m_cornerPixels, y), new Rectangle(sourceInnerArea.Right, 0, m_cornerPixels, m_cornerPixels), Color.White);

        // Bottom-right
        spriteBatch.Draw(m_texture, new Vector2(x + width - m_cornerPixels, y + height - m_cornerPixels), new Rectangle(sourceInnerArea.Right, sourceInnerArea.Bottom, m_cornerPixels, m_cornerPixels), Color.White);

        // Bottom-left
        spriteBatch.Draw(m_texture, new Vector2(x, y + height - m_cornerPixels), new Rectangle(0, sourceInnerArea.Bottom, m_cornerPixels, m_cornerPixels), Color.White);
    }

    private void DrawSides(SpriteBatch spriteBatch, int x, int y, int width, int height, Rectangle sourceInnerArea)
    {
        // Top
        spriteBatch.Draw(m_texture, new Rectangle(x + m_cornerPixels, y, width - 2 * m_cornerPixels, m_cornerPixels), new Rectangle(sourceInnerArea.Left, 0, sourceInnerArea.Width, m_cornerPixels), Color.White);

        // Bottom
        spriteBatch.Draw(m_texture, new Rectangle(x + m_cornerPixels, y + height - m_cornerPixels, width - 2 * m_cornerPixels, m_cornerPixels), new Rectangle(sourceInnerArea.Left, sourceInnerArea.Bottom, sourceInnerArea.Width, m_cornerPixels), Color.White);

        // Left
        spriteBatch.Draw(m_texture, new Rectangle(x, y + m_cornerPixels, m_cornerPixels, height - 2 * m_cornerPixels), new Rectangle(0, m_cornerPixels, m_cornerPixels, sourceInnerArea.Height), Color.White);

        // Right
        spriteBatch.Draw(m_texture, new Rectangle(x + width - m_cornerPixels, y + m_cornerPixels, m_cornerPixels, height - 2 * m_cornerPixels), new Rectangle(sourceInnerArea.Right, m_cornerPixels, m_cornerPixels, sourceInnerArea.Height), Color.White);
    }
}
We're taking Mr Panda to Las Vegas this September where he'll be on display at the CGE Expo, which has just been taken over by our good friends at Retrogaming Roundup, so massive thanks to them! It's looking like it's going to be an awesome few days and takes place September 12th to 14th.
